
Pass-through plugs let you see the wiring before you commit to a crimp
Quick answer
- Pass-through (Quick Term) plugs let all 8 conductors slide through the front of the plug, so the wiring order can be visually verified before crimping, no separate load bar required.
- Modern pass-through plugs from reputable manufacturers can meet Cat6/Cat6A performance requirements when correctly terminated with a matching crimp tool.
- Access Communications stocks the Datamaster® Quick Term range for Cat6 and Cat6A, along with the dedicated T0019QT crimp tool.
Pass-through RJ45 plugs, sold as Quick Term, trade the load bar's fixed wire alignment for something different: the ability to see the wiring order before you commit to a crimp. Instead of threading conductors into a load bar first, all 8 wires push straight through the plug body and become visible at the front, ready for a final check before the crimp tool seats the contacts and trims the excess in one action. This guide covers how pass-through plugs work, the tools you need, step-by-step termination, and two questions that come up often: whether pass-through plugs are TIA-568 compliant, and what to check on PoE jobs.
How a pass-through plug is different from a load bar plug
A standard 2-piece Cat6 plug uses a load bar to organise the 8 conductors into two staggered rows before they enter the plug body, a separate step that locks their position ahead of crimping. Pass-through plugs skip that step. The 8 conductors are pushed straight through the plug from the back until they poke out slightly at the front, where the installer can visually confirm the colour sequence is correct. The crimp tool then seats the gold contacts onto the conductors and trims the protruding ends flush in a single action.
Neither approach is inherently better, they solve the same problem (organising 8 conductors for a reliable crimp) with a different mechanism. For the full comparison, see our load bar termination guide.
Tools you'll need
Pass-through termination needs one different tool from the standard load bar process, everything else is the same.
- Cable stripper: A T0033 cable stripper sets the correct strip length and removes the outer jacket cleanly.
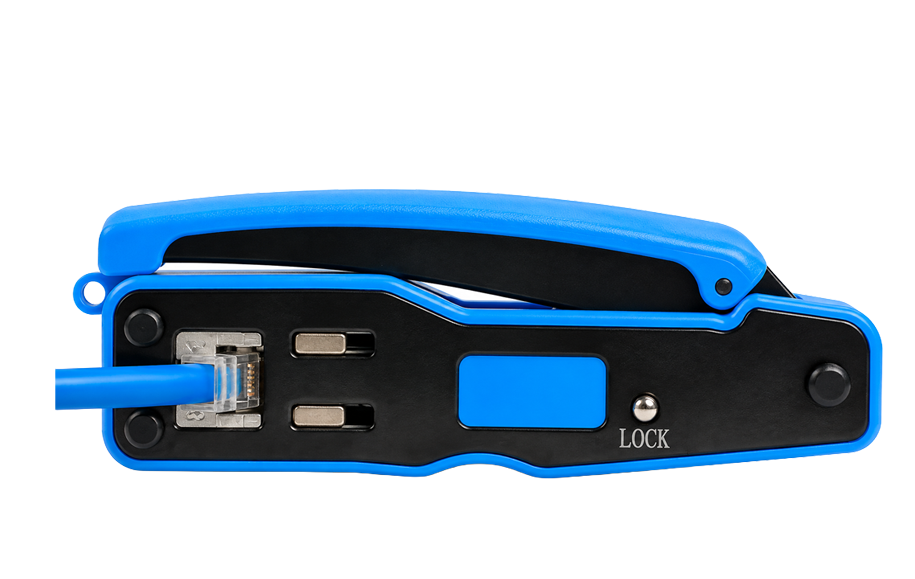
- Quick Term compatible crimp tool: A T0019QT crimp tool is purpose-built for pass-through plugs, it seats the contacts and trims the protruding conductor ends flush in one action. A standard 8P8C crimp tool without an integrated trim blade will not cleanly finish a pass-through plug.
- LAN cable tester: A T0042001 LAN cable tester verifies continuity and the wiring sequence.
Optional but recommended: strain relief boots in matching colour, slid onto the cable before terminating.
Australian wiring sequence: T568B
Pass-through plugs use the same T568A/T568B wiring standards as any other RJ45 termination. For new Australian commercial installations, use T568B. For the full pin-by-pin colour table and the reasoning behind the AU commercial default, see our RJ45 wiring guide (T568A and T568B).
Step-by-step termination: Cat6 pass-through plug (P2176QTUJ)
The following steps cover the Access Quick Term pass-through plug. Unlike the standard 2-piece plug, there is no separate load bar and no need to pre-trim the conductors to an exact length before insertion.
- Slide the boot on first. If you are using a strain relief boot, slide it onto the cable now. Boots cannot be added after the plug is crimped.
- Strip approximately 25mm of outer jacket. Pass-through terminations need slightly more exposed conductor length than a standard 2-piece plug, since the wires must reach all the way through the plug body. Use the T0033 cable stripper.
- Cut the rip cord and any cross-web divider. Trim both flush with the end of the jacket.
- Untwist the pairs and straighten each conductor. Untwist each pair back to the jacket and straighten each conductor. Do not nick or kink the conductors.
- Arrange the conductors in the correct sequence. Fan the eight conductors out flat in T568B order. Use the colour code table in our wiring guide.
- Insert the conductors into the plug. Push all eight conductors straight into the back of the plug body together, keeping them flat and in order, until every conductor is visible poking through the guide holes at the front of the plug.
- Verify the wiring order at the front. Check the colour sequence of the conductor tips visible at the front of the plug against the colour code table. This visual check before crimping is the main advantage of a pass-through design.
- Push the cable jacket fully into the rear of the plug. The jacket should sit inside the rear of the plug body, engaging the strain relief area, with no excessive bare conductor visible between the jacket and the plug body.
- Crimp the plug with a Quick Term compatible crimp tool. Insert the plug into the T0019QT (or equivalent) crimp tool. Squeeze the handles fully closed. This seats the contacts onto the conductors and trims the protruding conductor ends flush with the front of the plug in the same action.
- Check the trimmed ends and contacts. All eight conductor ends should be trimmed flush and level, with every gold contact pressed down evenly. Uneven trimming can indicate a worn crimp tool blade.
- Slide the boot up and snap it onto the plug. Slide the strain relief boot up the cable and snap it over the rear of the plug.
- Test the termination. Use the T0042001 LAN cable tester to verify continuity and the wiring sequence. Test both ends. Mark the cable as tested and label both ends with the run identifier.



Common termination mistakes
- Not stripping enough jacket. Pass-through plugs need slightly more exposed conductor than a load bar plug, since the wires must travel the full length of the plug body. Too short a strip and the conductors won't reach the front for verification.
- Skipping the visual check before crimping. The whole benefit of a pass-through plug is confirming wire order before committing to a crimp. Crimping without checking defeats the purpose.
- Using a standard crimp tool without a trim blade. A tool not designed for pass-through plugs won't trim the protruding conductors, leaving a rough, unreliable finish.
- Letting the crimp tool blade go dull. A worn blade can leave small conductor fragments at the front of the plug instead of a clean, flush cut. See the PoE note below for why this matters.
- Skipping the test. Untested terminations are the single biggest source of installer callbacks. A 30-second test with a T0042001 LAN tester saves hours of troubleshooting later.
Frequently asked questions
Do pass-through plugs use a load bar?
No. Pass-through plugs use a different termination mechanism that pierces the conductor insulation with internal IDC contacts, eliminating the need for a load bar and pre-trimmed conductors. Conductors slide through the front of the plug so the wiring order can be visually verified before termination.
Are pass-through RJ45 plugs TIA-568 compliant?
Modern pass-through plugs from reputable manufacturers can meet Cat6/Cat6A performance requirements when correctly terminated. Early pass-through designs drew an objection from certifiers because the trim cut left a small segment of exposed copper between the IDC contact and the cut end. Modern pass-through plugs, including the Datamaster® Quick Term range, place the trim cut within the IDC contact zone, which removes the exposed copper entirely.
Are pass-through RJ45 plugs safe to use with PoE?
A dull crimp blade can occasionally leave small conductor fragments at the front of a pass-through plug. Although issues are uncommon, these fragments can affect data performance or create a shorting risk in PoE applications, particularly in high-power PoE++ setups where the plug sits inside a metal-housed switch or patch panel. A quick visual inspection after termination is recommended.
What strip length should I use for a pass-through plug?
Approximately 25mm of outer jacket, slightly more than the 20mm used for a standard 2-piece load bar plug, since the conductors need to travel the full length of the plug body to be visible at the front.
Can I use a standard crimp tool on a pass-through plug?
Only if it includes an integrated trim blade designed for pass-through plugs. A standard 8P8C crimp tool without a trim function will crimp the contacts but won't cleanly trim the protruding conductor ends, leaving an unreliable, unfinished result. Use a Quick Term compatible tool such as the T0019QT.
Your Project, Perfected. That's The Access Advantage.
- Expert Local Support, Since 1973: Don't waste time with guesswork. Our experts have seen it all and are ready to provide the right solution, right now. Your success is our business.
- Your Specs, Your Brand, Our Build: Off-the-shelf not cutting it? We specialise in building custom cables and assemblies to your exact specifications, branded for your business. Let's create it together.
- Guaranteed for Life: Buy it once. Trust it forever. Our products are backed by a limited lifetime warranty, so you can invest in quality with zero risk. *Warranty excludes third-party brands such as HALO and UPS.
Let's get your project started.
Talk to an expert today for a custom quote or browse the solutions most relevant to your search.